
close
Choose Your Site
Global
Social Media
Views: 0 Author: Site Editor Publish Time: 2026-09-10 Origin: Site


Evaluating an injection molding color masterbatch sample represents a high-stakes decision for any manufacturing operation. Too often, teams approve materials based on a quick visual glance. Relying purely on visual checks before mass production sets the stage for disaster. You will inevitably face lot-to-lot color variations, unexpected mechanical failures, and costly rejected batches. We must establish a standardized, data-driven evaluation framework. This framework lets you compare samples from competing vendors accurately. It focuses on optical precision, rheological compatibility, and true cost-in-use. You need a skeptical, evidence-based approach. Move away from empty vendor promises. Instead, embrace empirical testing methodologies. This article guides you through leveraging L*a*b* data, thermal stress tests, and dispersion analysis. You will learn how to evaluate samples scientifically. This ensures flawless production runs and protects your final product quality.
Human subjectivity ruins color evaluation. You might look at a plastic plaque under fluorescent office lights. It looks perfect to your eyes. Your client then checks it outdoors under natural sunlight. They reject it immediately. This phenomenon happens due to metamerism. Colors shift their appearance under different light sources. We cannot rely on the naked eye for industrial production. You must eliminate baseline human errors entirely.
Evaluation metrics require hard data. Use a high-quality spectrophotometer or precise colorimeter. These devices capture the L*a*b* color space values. The "L" metric represents lightness. The "a" metric tracks green to red hues. The "b" metric measures blue to yellow hues. Capturing this data removes all guesswork from your quality control process. It gives you a numerical fingerprint for every sample.
Next, determine your acceptable Delta E ($\Delta E$) tolerance. Delta E quantifies the exact distance between two colors in the L*a*b* space. Consumer electronics demand very strict tolerances. You should aim for a Delta E under 1.0. Industrial parts often allow more flexibility, permitting a Delta E up to 2.0. Compare how closely each vendor's sample hits your specific project target.
Finally, conduct formal light box testing. Assess all sample plaques under standard illuminants. Use the D65 setting to simulate natural daylight. Use TL84 to mimic standard retail store lighting. Use Illuminant A to replicate incandescent bulbs. This multi-light approach rules out metameric failure entirely.
Many vendors offer "universal" carriers to save production money. These carriers often compromise the mechanical integrity of the final molded part. They cause severe cosmetic defects like splay and delamination. You cannot afford these structural weaknesses in demanding applications. The carrier resin must blend perfectly with your base polymer.
Evaluate the Melt Flow Index (MFI). Compare the MFI of the masterbatch sample against your raw base polymer. The masterbatch should ideally have a slightly higher melt flow. This physical trait ensures uniform mixing as the screw rotates. If the sample flows too poorly, you will get color streaks. If it flows too fast, you risk poor dispersion.
Verify polymer specificity next. The sample must utilize a highly compatible carrier resin. If you mold polycarbonate parts, demand a polycarbonate carrier. Mixing incompatible resins degrades impact resistance rapidly. Using a specialized, high quality color masterbatch for injection preserves the molecular bonds of your base plastic.
Test the impact on flowability during a short run. Monitor your injection pressure requirements closely. A premium masterbatch will not drastically alter your gating times. It preserves your existing mold setup parameters. It allows the melt to fill thin-walled sections without hesitation.
Summary Chart: Universal vs. Specific Carrier Resins
| Carrier Type | Mechanical Impact | Best Application Use Case | Risk of Delamination |
|---|---|---|---|
| Universal (e.g., EVA-based) | May reduce tensile strength | Low-cost commodity packaging | High in engineering resins |
| Polymer-Specific (e.g., ABS in ABS) | Maintains baseline properties | Automotive, Medical, Electronics | Extremely Low |
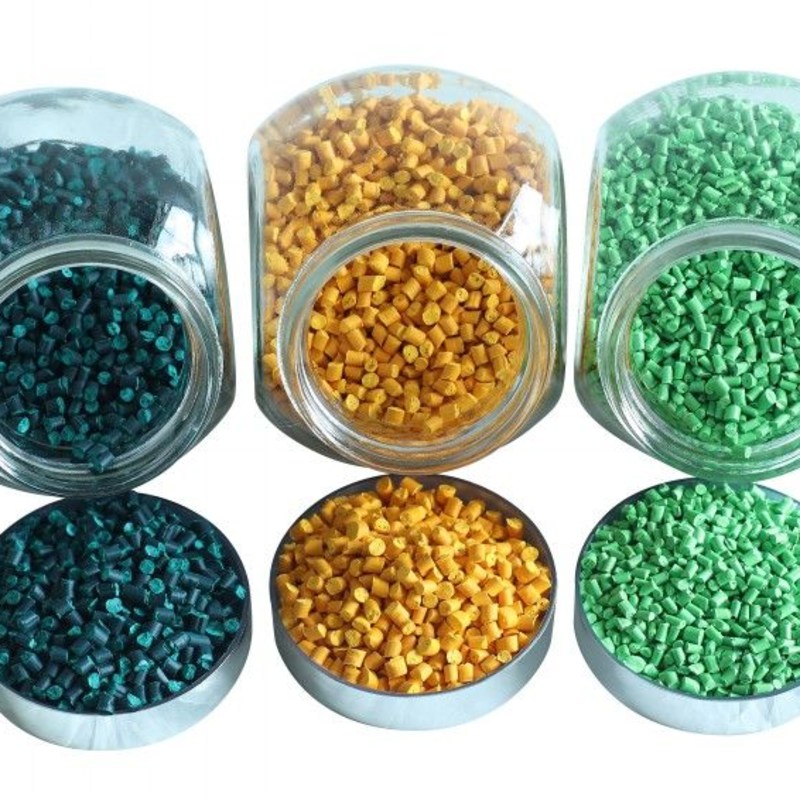
Pigments might look perfect while sitting at room temperature. However, injection barrels generate immense heat and high shear forces. Colors often degrade, burn, or shift in hue under these extreme conditions. You must validate the thermal limits of every sample.
Check the injection molding color masterbatch specifications document first. Look closely at the maximum processing temperatures. Ensure they exceed your normal operating parameters by at least 20 degrees Celsius. The screw generates shear friction. This friction spikes the melt temperature higher than your barrel heater settings.
Conduct a residence time stress test. Molding machines frequently stop during production. Material sits inside the hot barrel during these pauses. You need to know exactly how the pigment reacts when baked.
Follow this numbered sequence to execute a proper thermal stress test:
Evaluate migration and bleeding simultaneously. Pigments can migrate to the surface over time. This happens frequently in high-temperature operating environments. You can test sample plaques in a laboratory oven. This accelerates the aging process and reveals bleeding risks early.
Poor dispersion ruins plastic parts instantly. You will see streaks, specks, and weak points across the surface. Many buyers mistakenly purchase a "cheap" masterbatch. This cheap option often requires a 5% addition rate. A premium alternative might only need a 2% addition rate. The cheaper option is actually less economical when you run the math.
Perform a visual defect analysis on your samples. Mold very thin-walled plaques. Hold these plaques up to a strong light source. Look for un-dispersed pigment agglomerates. They appear as tiny dark dots blocking the light. These agglomerates act as stress concentration points. They create crack initiation sites in your finished parts.
Calculate the true cost-in-use carefully. You must base this calculation on the manufacturer's recommended Let-Down Ratio (LDR). Do not just look at the raw invoice price per kilogram. A highly concentrated color masterbatch stretches further across your production run.
Mechanical degradation matters significantly here. High let-down ratios introduce more carrier resin into your mix. This dilutes the structural properties of your engineering plastics. Lower LDRs provide high-dispersion qualities while protecting your baseline polymer properties. Stronger parts equal fewer customer returns.
Cost-in-Use Calculation Example
| Sample Vendor | Price per Kg | Required LDR | Cost to Color 1,000 Kg of Resin |
|---|---|---|---|
| Sample A (Economy) | $4.00 | 5% (50 Kg needed) | $200.00 |
| Sample B (Premium) | $8.00 | 1.5% (15 Kg needed) | $120.00 |
A perfect sample plaque means very little ultimately. The supplier must be able to scale production without introducing lot-to-lot variance. Consistency separates reliable partners from amateur compounders. You must audit their quality control infrastructure.
Demand rigorous quality control documentation upfront. Request Certificate of Analysis (CoA) records for every sample provided. The CoA must show actual testing data. It should list the date, batch number, and measured L*a*b* values. Do not accept vague approval stamps.
Ensure strict regulatory compliance for your market segment. The supplier must provide up-to-date documentation. Match these documents against your industry requirements. You might need FDA-approved food-grade materials for kitchenware. Medical applications require strict USP Class VI certification. Automotive parts demand rigorous UV resistance standards like REACH and RoHS.
Assess scalability risks before placing large orders. Ask about their standard lead times. Check their minimum order quantities (MOQs). A reliable injection molding color masterbatch supplier uses automated color-matching technology. Automation guarantees future batch repeatability. Manual weighing processes introduce significant human error. Avoid suppliers relying entirely on manual mixing for large industrial runs.
Choosing the right sample requires moving past initial aesthetics completely. You must validate thermal stability, MFI compatibility, and strict $\Delta E$ tolerances using empirical data. Do not accept testing shortcuts. Eliminate samples utilizing universal carriers for engineering-grade projects immediately. Shortlist the supplier offering the best overall balance. You want a low Let-Down Ratio, documented lot consistency, and high thermal stability under stress.
As a final step, request a 25kg trial run of your shortlisted masterbatch. Run this material through your actual tooling. Validate its flow and dispersion performance in real-world conditions. Complete this step before signing any long-term supply agreement.
A: Universal carriers are acceptable for commodity plastics (like PE or PP) in low-requirement applications, but they risk causing mechanical weakness and flow issues in engineering resins (like PC, POM, or Nylon). Always prefer polymer-specific carriers for structural parts.
A: This is often due to differences in part thickness, mold surface finish (polished vs. textured), or cooling rates affecting polymer crystallinity. Always test samples in your production mold, not just on generic plaques.
A: Do not rely entirely on the spec sheet. Run an initial melt flow test, perform a residence time thermal stress test, and map the L*a*b* values against your master standard using your own colorimeter.
